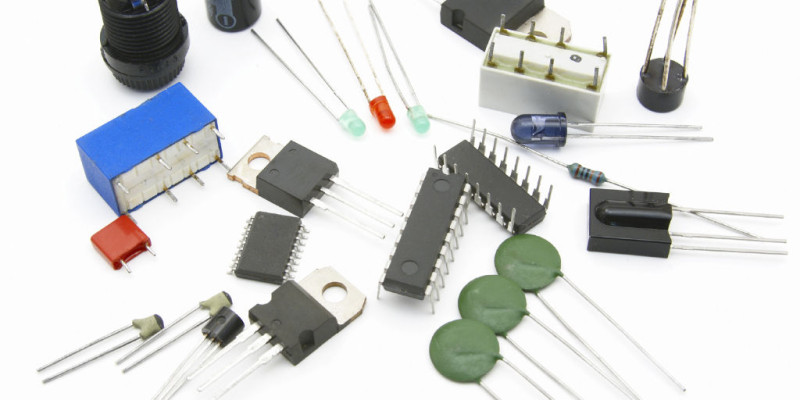
Presuming you have already read the post Getting Started With Arduino and got your self up and running, then you're going to need a few things to connect to it! We've made a list of some of the common things you need, what they are and why you need them. You can get packs, or starter kits containing these electronics components, but if you have a read through this post, you can narrow down what you need.
Solderless Breadboard

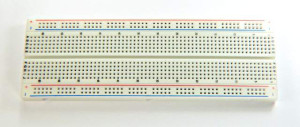
A breadboard is a little device to help in prototyping. Because is is solderless, it can be reused again and again. The idea of a breadboard is that you can design your circuits temporarily, without having to commit your design and components into a fixed board. You simply place your components on the board, and connect them via jumper cables to other components and your Arduino.
A breadboard has convenient tracks that run vertically along the side of the board. These are usually your power rails. Each horizontal row also has connected tracks, allowing you to connect the lead of 2 different components without the need to use a wire between them. The breadboard is without doubt the most important tool in the chain! Without it you would have to connect the component pins some other way! Getting a larger breadboard is a good idea as you have more room to make larger circuits.
Wires
These have different names and come in different types. Basically a wire carries electricity along the length of the wire. There are 2 types of wire - stranded and solid core. Solid core is a single thick piece of wire wrapped in insulating material. These are prone to breaking if you constantly bend and flex them.
Solid core wire is better suited to applications where it will not be moved much. Stranded wire is made up of smaller 'strands' of wire, all interleaved and covered in insulating material. These are far more flexible, and are similar to what is used in speaker cable. These are ideal for applications where the wire will be moved and needs to be a bit more rugged. Wires come with varying thickness (known as gauges) dependent on how much current the wire needs to carry.
Jumper Cables
Jumper cables are wires specifically used in prototyping. They are wires which have a solid end in which they can be plugged into breadboards or sockets. Jumper cables can either be bought or home made from solid core wire.
LEDs

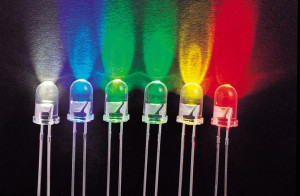
LEDs (light emitting diodes) are a staple of Arduino projects. They are a component which simply emits light. They come in varying sizes, shapes and colours, and are suited for different applications. In the Getting Started With Arduino tutorial, we saw an LED light up on the Arduino board.
A diode is a component that only allows current to travel one way through it. An LED must be connected the correct way before it will produce light. The positive leg is called the anode. It is usually longer than the other leg and must be connected to the power source.
The negative leg is called the cathode. It is usually the shorter of the 2 legs and must be connected to ground. The cathode will also have a flat edge above it in the LED case to denote which side it is on. This is useful as some LEDs have legs the same size. Most LEDs will need a resistor in series with it as they cannot handle the voltage supplied by the Arduino.
Resistors
Resistors are a common component in electronics. A resistor basically 'resists' the electricity and limits the voltage that goes through it. Resistors come in various values, which are measured in ohms (with the symbol Ω).
The resistance of the resistor is calculated by using Ohm's law, which is I = V/ R. (I = current in amperes, V = voltage in volts and R = resistance in ohms). This formula allows you to calculate the resistor value needed for a circuit. Resistors are colour coded to indicate their value, as they are usually too small to have text written on them.
Switches / Buttons

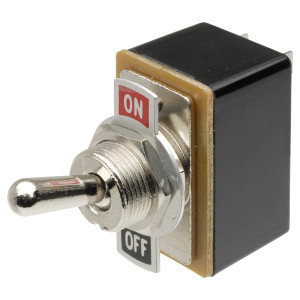
A switch basically 'makes' or 'breaks' a circuit. Switches are usually operated by human interaction, similar to the way a light switch works. When the switch is in one position, current will flow and the light will come on. In the other position, the circuit is broke and no current will flow to the light.
Switches can also divert current to different sources. For example, in a car, the indicator stalk has 3 settings. Dependent on the position of the switch, either the left indicators will light up, the right will light up, or none.
Some switches are not operated manually, but are switched in relation to a predefined variable. For example, the thermostat in your house is a switch that is set to operate above and below a certain temperature. There are also non latching switches, which will only break (or make) the circuit when it is held down, similar to your keys on a keyboard.
Variable Resistor / Potentiometer
A potentiometer (or 'pot') is a resistor with a variable value. An example of this is a volume knob on a hi-fi. When the pot is at its lowest setting, no voltage is recorded, and at its full setting, full voltage is recorded. These are used with the 'Analog In' pins of your Arduino.
It has a positive terminal, which will be your 5v, a negative, which will be Gnd, and the 3rd (usually middle) pin is the value the potentiometer is at, expressed as a voltage between your positive voltage and negative voltage (usually between 0v and 5v with Arduino). If you feed in a 5v signal, and set the pot to half, then a voltage of 2.5v will be emitted from the pot. The potentiometer has 3 pins.
OK so there you go, the basic components you need to know. Most easy projects use a combination of these, so you should get familiar with them and have some on hand before starting your projects.
